Cold and flu season is upon us.
With chilly temperatures, heavy snow in some parts of the U.S. and cold rain in other parts, our immune systems are taking hits from all sides.
We’re all looking for ways to prevent sickness this time of year.
When I was in college I would take an over-the-counter decongestant to delay sickness (it worked for a while, but then when it hit, it would hit hard). Now I look for more natural ways to boost my immune system throughout the year so I’ll be less likely to get sick in the winter time.
Even though I do get sick less, it’s hard to prevent it altogether. But there are a few tricks I’ve learned along the way that seem to really work, and I haven’t had much more than a sniffle for about 3 years.
The front line of defense during the winter is bone broth.
 A traditional food of the highest degree, every society has relied on broth in some form for thousands of years, and for good reason.
Broth provides our bodies access to a rich source of nutrients that bolster our immune systems and nourish us at a deep level. When you make bone broth, you use the whole animal (and veggie scraps), allowing you to reduce our waste while boosting nutrient intake.
Broth is versatile: use it as a base for soups, stews and grains.
This is an easy way to make every meal more nutrient dense. Drink as much broth as possible during the winter. I have a batch of broth going almost constantly in the winter, and I drink several cups per day, either plain with a little salt, or incorporated into other dishes.
Throughout the rest of the year I make bone broth–about a batch per week and still use it in all of my dishes.
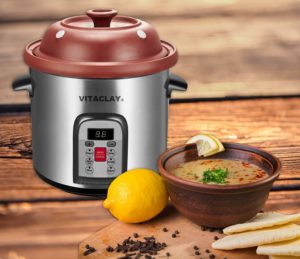
It’s a great way to stay warm, hydrated and nourished during the cold winter months! VitaClay is an ideal tool for safely making nourishing bone and vegetable broth—you can let it cook all night and all day and go about business as usual.
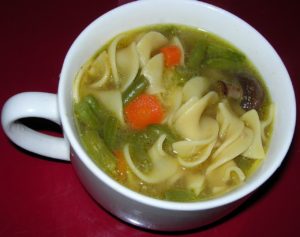
We have all heard chicken noodle soup is the best way to heal yourself of a cold or other illness. But why is this age-old recipe so effective? Is it the chicken? The veggies? The noodles?
The secret is really in the broth.
Traditionally every soup was made with a base of broth, not water. These days we grab a bouillon cube to flavor soup and other dishes, but did you know that real, traditional bone broth is a very healing and nourishing food?
Make bone broth! It’s good for so much more than just flavoring–though it does that very well.
Make bone broth! Homemade bone broth will add a rich, velvety texture and a deep flavor to anything it touches. It’s also filled with nourishing minerals and proteins that build immunity at the cellular level.

For any soup, stew or chili recipe I use I make bone broth as the base, and I add it to a lot of other things as well. For example, I’ll add a spoonful to a stir fry that is getting dry, instead of adding water or more oil.
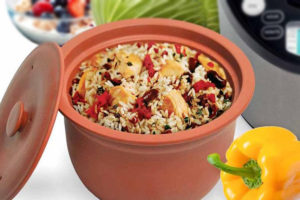
I also always use broth as a cooking liquid for rice, quinoa or any other savory grain: it boosts nutrition and adds a really great flavor. With broth and a little butter, rice becomes very filling–almost a whole meal by itself!
Whenever my husband eats rice from a restaurant, he comments that the rice I make tastes much better.
How Can I Make Bone Broth?
The best part about bone broth is that it’s so easy to make, and practically free! The stores sell tetra packs of stock on the cheap, but if you want to get the deeply nourishing benefits of bone broth, the real thing is usually found in the freezer section of the health food store or you can order it in bulk online.
Bone broth is amazing because you can literally make bone broth from your “trash” –veggie scraps and bones (that’s better than free!). Save the bones and veggie scraps from meals during the week in a container in the fridge or freezer, and when you have a few handfuls, throw them in the slow cooker and get going!
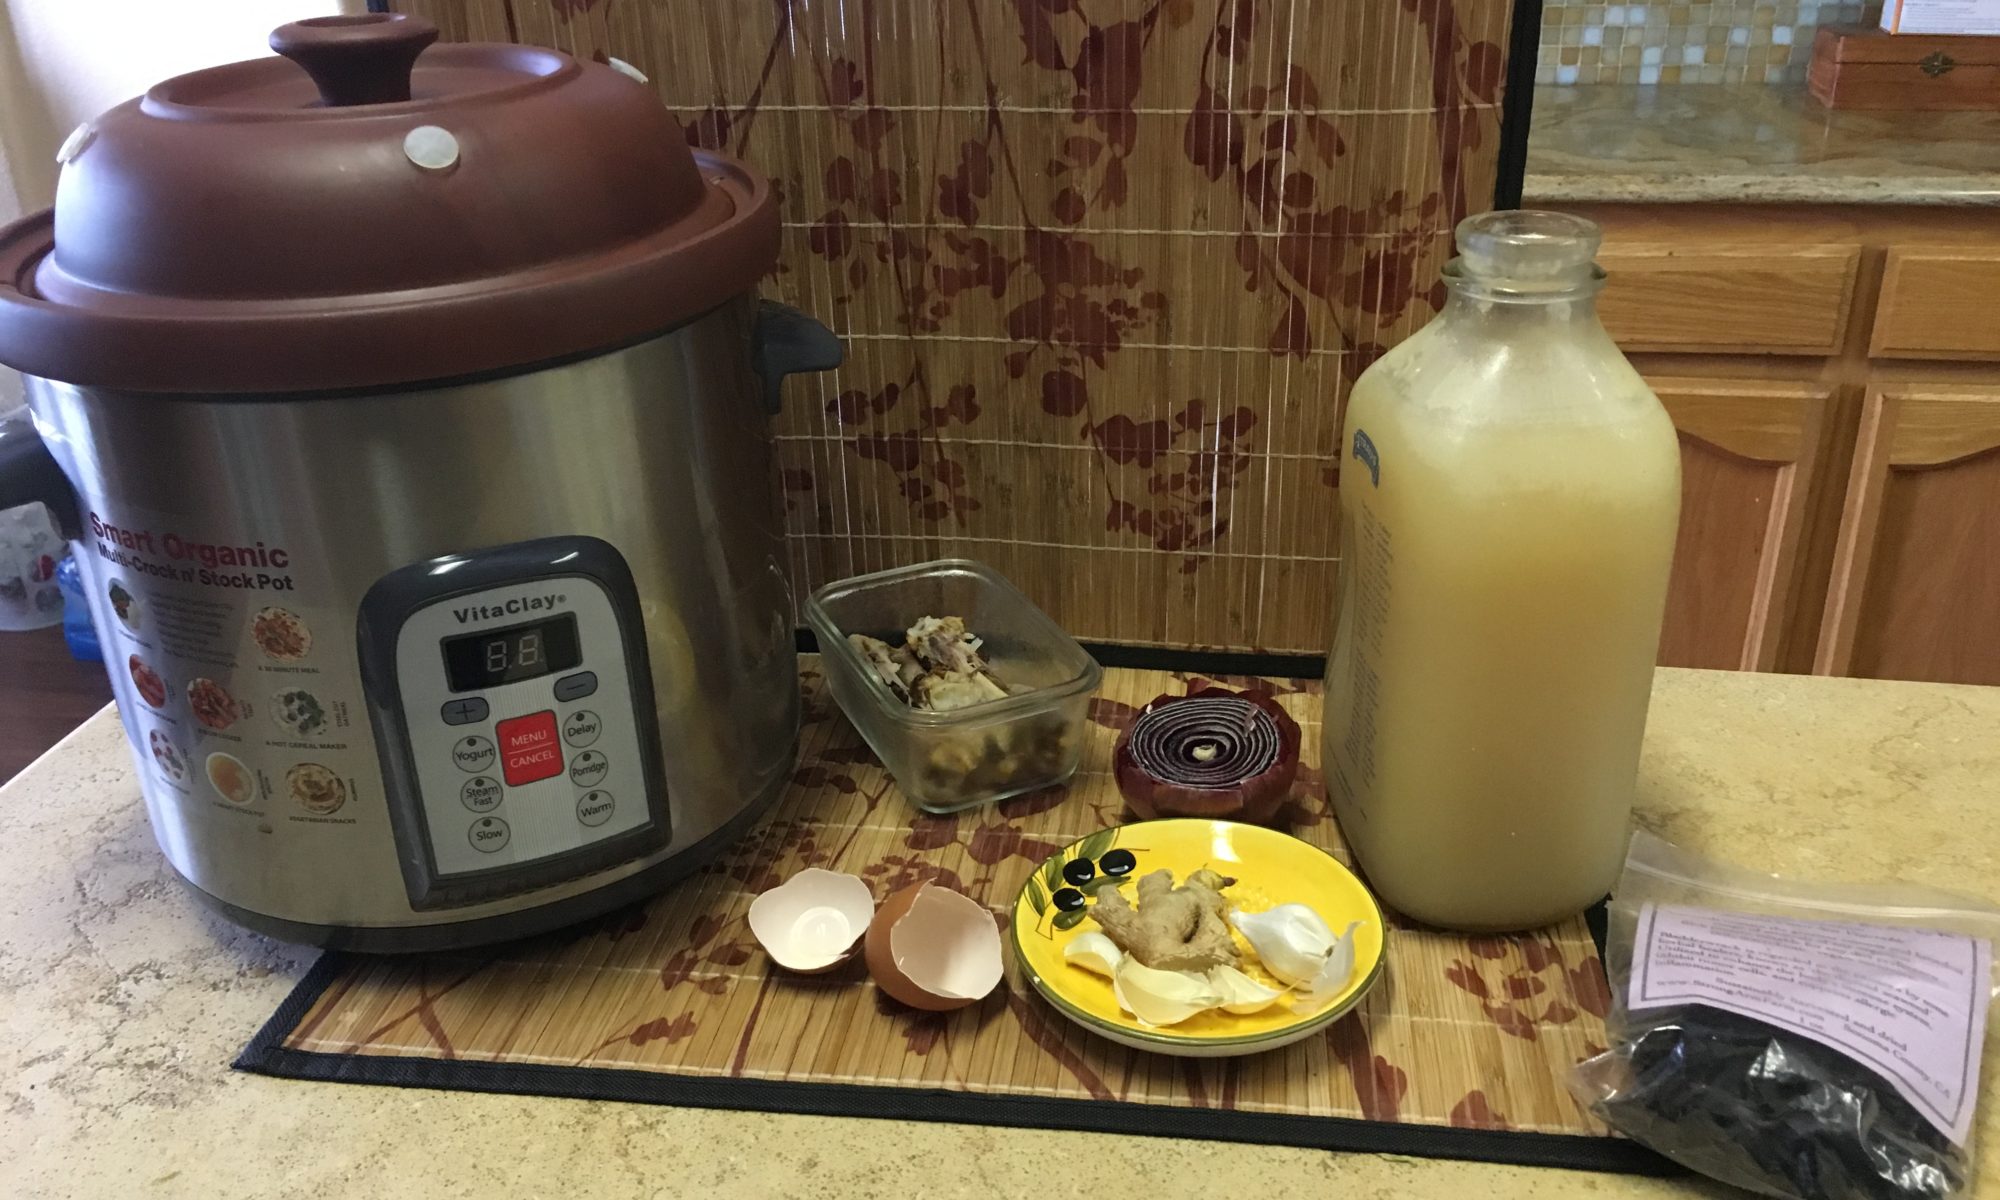
Here is a quick, easy recipe for any type of bone broth:
Ingredients
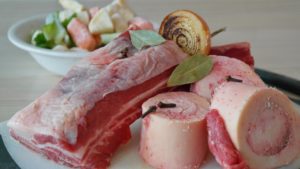
- Bones (soup bones or bones left over from this week’s dinners)*
- Veggie scraps from the week’s meals (mushrooms, celery, carrots, etc)*
- Eggshells, oyster shells, etc: these add calcium and minerals!
- Seaweed strips (optional: these add lots of minerals and iodine)
- Ginger and garlic–boosts the anti-oxidant and immune-building properties
*Scraps can also be frozen to use in a future batch of broth if it will be more than a few days until you can cook them.
Directions
- Add bones, scraps and other ingredients to pot
- Fill the rest of the pot with purified water
- Cook on “soup” (for VitaClay) for 3-5 hours (up to 24 hours)
- Strain, bottle and freeze or refrigerate
- Use in everything!
I love to make bone broth in my VitaClay, because it is electronic and I can safely leave the broth cooking for hours and hours while I sleep at night or run errands during the day.
As a bonus, VitaClay does pretty much all of my cooking: it makes rice, quinoa, and other grains; it makes yogurt (!) and all manner of slow-cooking dishes, from roasts to stews, soups and beans and steamed veggies or fish. It’s truly a multi-cooker, and I don’t use anything else for any of these dishes.
If you want to make bone broth at home and hire your “personal chef” (VitaClay) to cook all of your meals for you, use coupon code NOURISH10 at check-out for 10% off any product on the website.
Also, if you have a dog chicken bones are great to feed them as bone meal after you make bone broth: you’ll know they’re ready when you can easily crush the bones with one hand.
These bones keep going, and going and going….!
Do you make bone broth? What is your favorite way to use bone broth?
How often do you make bone broth at home?
New to Freedom & Coffee? Start here.
Disclosure: many of the product links in this post are affiliate links, which means I will receive a small commission from any purchase. I only recommend products that I love and this is at no extra cost to you. Thank you for supporting our mission with your clicks!

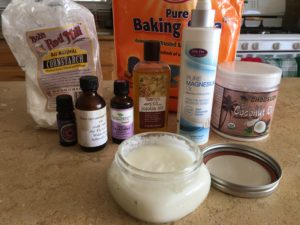
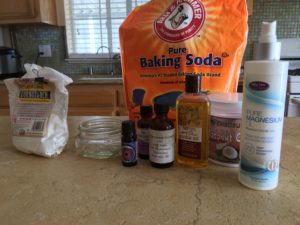
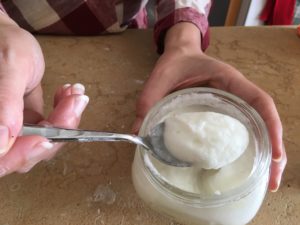 *The magnesium oil, jojoba oil and essential oils are not completely necessary: the essential oils are for scent, and the jojoba/Vitamin E are soothing. I like to add the magnesium oil because it’s a great way to absorb more magnesium and it gives the deodorant a fluffier texture that I really like.